Showing posts with label Eat. Show all posts
Saturday, September 10, 2011
Eat: Upon my triumphant return to the kitchen. . .
We are in week five of our kitchen project. This means that I have not cooked a rack of ribs, an oatmeal chocolate chip cookie, not so much as a Monday Night Pizza in over a month.
I'm not complaining about being displaced from the kitchen. How bad can things be if you can afford to increase your counter space? As a bonus, just when I had convinced myself that having our kitchen done was a frivolous expense, our contractor informed us that when he and his crew pulled the walls down to replace a rotten window they found and fixed structural deficiencies that threatened to drop our second floor bedrooms into the basement one night as we slept. So, not only am I thankful for gleaming countertops and cabinets from this century, I am free from the guilt of an entirely cosmetic improvement.
I am realizing, however, how much I enjoy my time in the kitchen and how eager I am to get back to cooking. Over the past month I've accrued a lot of restaurant crayons in my purse, filled my freezer with an international smorgasbord of Trader Joe's offerings (and highly recommend the steamed pork buns), made frequent use of the grocery store salad bar and tried to get creative with a rotisserie chicken. In between all that, though, I've been making some plans for all that I shall accomplish up upon my triumphant return to the kitchen.
I've favorited these pumpkin muffins with dark chocolate and pistachios from Leena Eats. Not only are the flavors right up Big E's alley, but the recipe, with its molasses and whole wheat flour, looks significantly healthier than the frozen chocolate chip muffin tops we've been nuking for her every morning.
These homemade McRibs from Saveur.com aren't new to me, but of everything I've ever cooked these may be my favorite and so they are on the list. In fact, we've recently decided to make them a part of our new Christmas night tradition: homemade McRibs followed by a cheesy family movie at the nearly empty theater.
Speaking of holiday meals, when I get the kitchen back I'll audition these sweet potatoes with pecans and goat cheese from Smitten Kitchen for possible inclusion in our Thanksgiving dinner. They are essentially a sweet potato-based bruschetta and include some of my favorite flavors.
Food52.com has been a valuable source of food porn during my kitchenless weeks. Though after all of the restaurant bread baskets I've been hitting I probably don't need the carbs, I'm looking forward to making this Capellini with Nantucket Bay Scallops that I found there. I'm also hoping that my husband will make me this BEAT (bacon, egg, avocado, tomato) sandwich for breakfast one weekend; as I normally have a granola bar and a Diet Coke in the bathroom while I do my hair, real breakfast prepared by someone other than me is one of my happiest indulgences.
Finally, I've decided to take another crack at the ice cream maker just as soon as I dig it out of whatever crate it ended up in, and I'm starting with Green Tea Ice Cream from Epicurious.com, hopefully reminiscent of the Haagen Daz green tea ice cream that my husband and I bought in little cups from a Tokyo convenience store on our honeymoon. My backup plan, should my homemade ice cream prove a soupy unappealing mess as it did in my previous attempts, is this Mocha-Caramel Sauce from Big Girls Small Kitchen served over a more reliable store-bought ice cream.
The kitchen should be done in a week or two, though I really can't predict when I'll get around to unpacking the many crates off cooking implements stacked throughout our dining room. Until then, I'll continue compiling my list
Anything I should add?
Labels:
big girls small kitchen,
Eat,
eating out,
Epicurious,
food52,
kitchen remodel,
leena eats,
recipes,
Saveur,
smitten kitchen
Tuesday, July 19, 2011
Eat: The Beach Picnic
Earlier this summer, my husband took a week long class and I spent the week hanging out with the girls. For many mothers all this alone time with the kids is status quo, but I am spoiled by being married to a fellow teacher and so am used to having adult company all summer.
For some reason spending this first week of summer with the girls while he was off learning about globalizing education or some such made me think of Liz Lemon, Tina Fey's character on 30 Rock. She aspires to be like Ina Garten, Food Network's Barefoot Contessa, who, according to Liz, sees her husband only on weekends and spends the rest of the time eating and drinking with her gay friends. Our trip to the zoo and our doughnuts on the beach lacked the understated Hamptons elegance of Ina's weekdays and my companions weren't nearly as fashionable as hers. Nonetheless, I was inspired.
To celebrate my husband's last day of class the girls and I put together a beach picnic dinner, which seemed very much like something Ina would spend an episode on in eager anticipation of husband Jeffrey's return. We didn't pack a linen tablecloth like I'm sure Ina would have and we burnt the cookies, but we did manage a very tasty steak sandwich and a variation on my old favorite, watermelon salad.
Seared Steak Sandwich with Arugula and Parmesan
2 New York Strip Steaks
Salt and Pepper
About 3 cups of baby arugula
1 tablespoon Olive Oil
1/2 tablespoon balsamic vinegar
Wedge of Parmigiano-Reggiano (you won't use the whole thing)
loaf of french bread
Preheat the oven to 450.
Pat the steaks dry on all sides and season with salt and pepper. Heat a cast iron skillet over high heat. Once it is hot enough that a drop of water sizzles on its surface, add the steaks and sear them for two minutes on each side.
Once you've done this, put the steaks in the heated oven for about 4 minutes. Remove them from the pan and allow them to rest on a carving board.
Meanwhile, whisk together the oil and vinegar in the bottom of a medium bowl, then add the arugula and toss until it's coated.
Slice the steak on the diagonal into 1/4 inch thick slices, pouring any juices that are released back over the sliced steak.
Cut the bread to the desired size for your sandwiches and pile it with dressed arugula followed by slices of steak.
Finally, use a vegetable peeler along the side of the parmigiano-reggiano to create extremely thin slices to top the steak.
Watermelon with Goat Cheese and Pistachios
1/4 watermelon, cut into bite-sized chunks
2 oz. goat cheese
1 cup of shelled pistachios
Prepare individual salads by dividing the watermelon among four containers. The Barefoot Contessa would use little Mason jars or something equally tasteful; I went for disposable faux-Tupperware.
Crumble goat cheese over the watermelon.
Coarsely chop the pistachios and sprinkle them over the salads.
For some reason spending this first week of summer with the girls while he was off learning about globalizing education or some such made me think of Liz Lemon, Tina Fey's character on 30 Rock. She aspires to be like Ina Garten, Food Network's Barefoot Contessa, who, according to Liz, sees her husband only on weekends and spends the rest of the time eating and drinking with her gay friends. Our trip to the zoo and our doughnuts on the beach lacked the understated Hamptons elegance of Ina's weekdays and my companions weren't nearly as fashionable as hers. Nonetheless, I was inspired.
To celebrate my husband's last day of class the girls and I put together a beach picnic dinner, which seemed very much like something Ina would spend an episode on in eager anticipation of husband Jeffrey's return. We didn't pack a linen tablecloth like I'm sure Ina would have and we burnt the cookies, but we did manage a very tasty steak sandwich and a variation on my old favorite, watermelon salad.
Seared Steak Sandwich with Arugula and Parmesan
2 New York Strip Steaks
Salt and Pepper
About 3 cups of baby arugula
1 tablespoon Olive Oil
1/2 tablespoon balsamic vinegar
Wedge of Parmigiano-Reggiano (you won't use the whole thing)
loaf of french bread
Preheat the oven to 450.
Pat the steaks dry on all sides and season with salt and pepper. Heat a cast iron skillet over high heat. Once it is hot enough that a drop of water sizzles on its surface, add the steaks and sear them for two minutes on each side.
Once you've done this, put the steaks in the heated oven for about 4 minutes. Remove them from the pan and allow them to rest on a carving board.
Meanwhile, whisk together the oil and vinegar in the bottom of a medium bowl, then add the arugula and toss until it's coated.
Slice the steak on the diagonal into 1/4 inch thick slices, pouring any juices that are released back over the sliced steak.
Cut the bread to the desired size for your sandwiches and pile it with dressed arugula followed by slices of steak.
Finally, use a vegetable peeler along the side of the parmigiano-reggiano to create extremely thin slices to top the steak.
Watermelon with Goat Cheese and Pistachios
1/4 watermelon, cut into bite-sized chunks
2 oz. goat cheese
1 cup of shelled pistachios
Prepare individual salads by dividing the watermelon among four containers. The Barefoot Contessa would use little Mason jars or something equally tasteful; I went for disposable faux-Tupperware.
Crumble goat cheese over the watermelon.
Coarsely chop the pistachios and sprinkle them over the salads.
Labels:
Barefoot Contessa,
Eat,
Picnic,
Steak Sanwiches,
Watermelon salad
Sunday, July 3, 2011
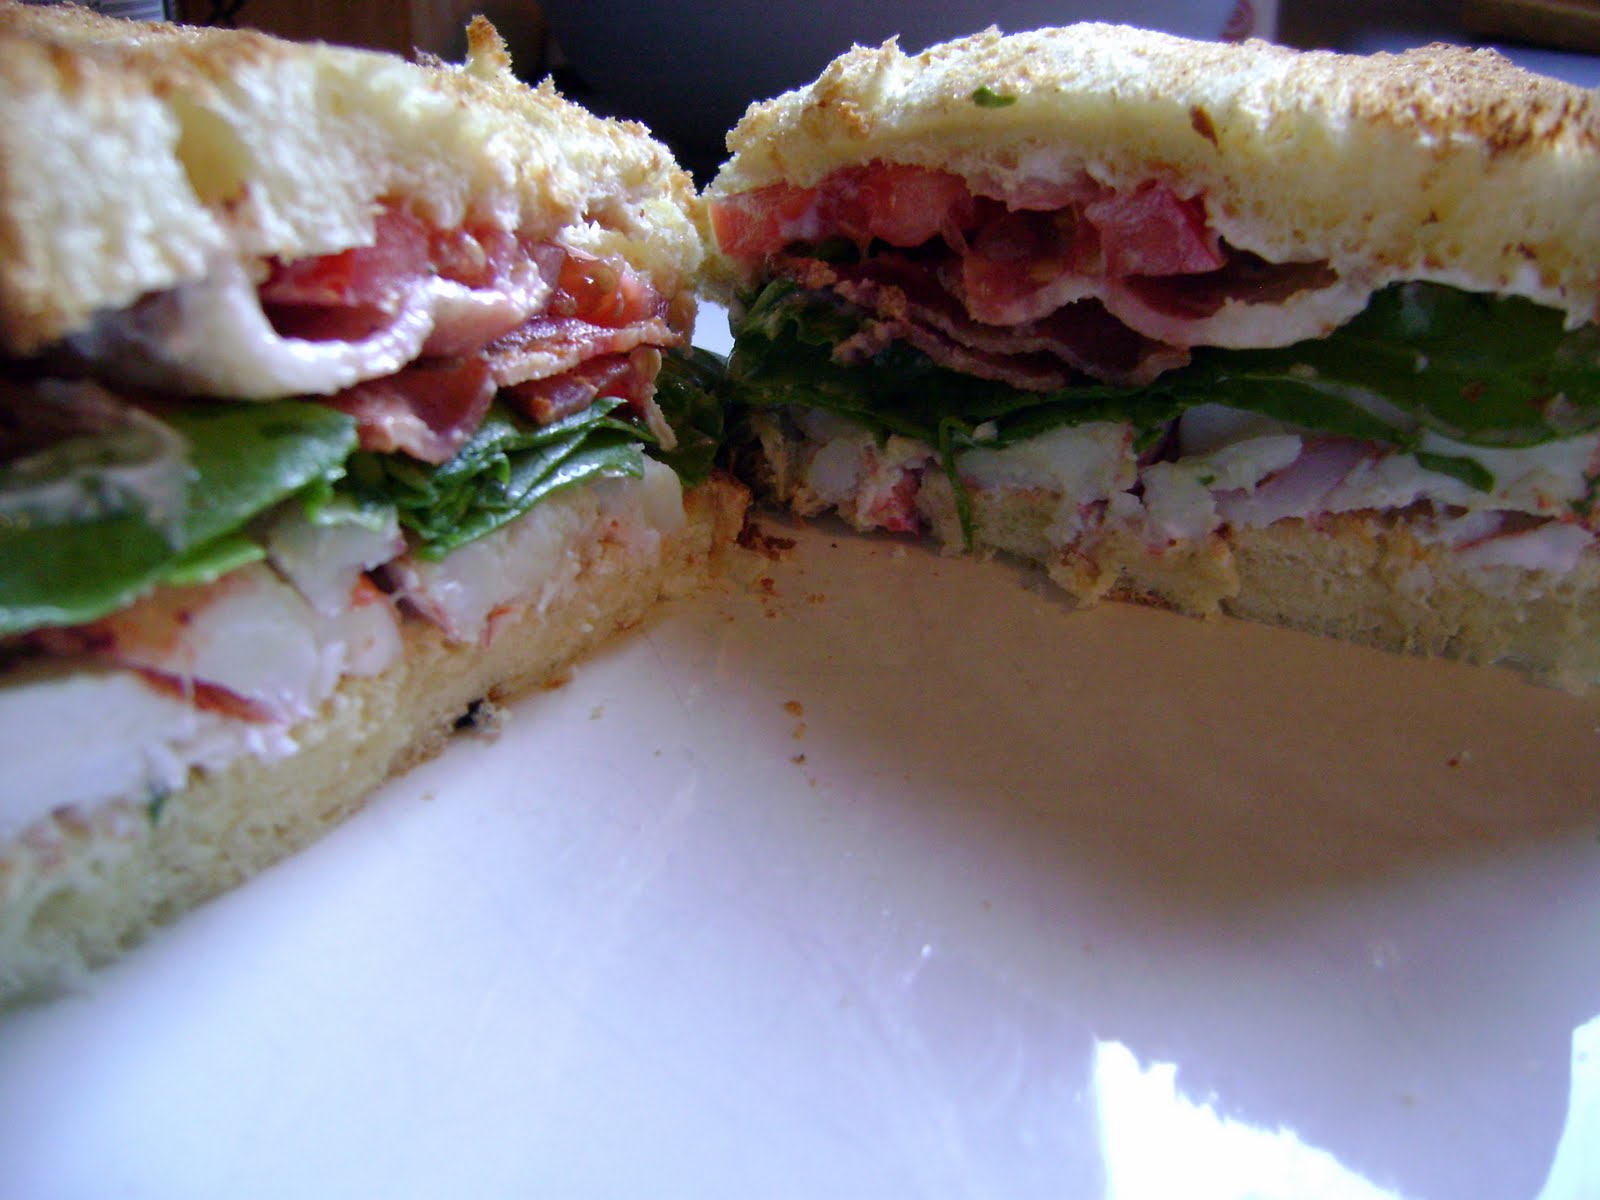
Eat: Lobster BLT with tarragon-lemon mayonnaise
Back then I was a sort-of vegetarian. I didn't eat red meat at all, rarely ate chicken and hadn't really taken a stand on seafood; in reality, it was all probably a product of the same food weirdness that had rendered me incapable of eating in front of boys in high school and I eventually grew out of it. At the time, though, when I pulled up to the table surrounded by my then boyfriend, his two older sisters, his parents and his grandparents, I simply couldn't fathom tying on a plastic bib, tearing a crustacean limb from limb and slurping down its butter-dipped innards, and so I politely declined. His family's ensuing shock, insistence on my eating mounds of salad, and speculation about the motivation behind my pseudo-vegetarianism made me silently vow that I would learn to eat lobster like a grown up, a skill that would have saved me one of the most blushingly uncomfortable meals of my life.
I'm happy to report that I have, in fact, learned to eat lobster, though I mostly stick to the tail and legs and sometimes need some help tearing off the body. So, when my in-laws came to visit last weekend, some 17 years after that first lobster dinner, I decided that I'd serve them lobster on my own terms. I made these sandwiches and served them with corn on the cob, a not-too-heavy-on-the-mayo cole slaw from epicurious.com and beer (UFO White with lemon wedges). And I ate it like a grown up.
Lobster BLTs with tarragon-lemon mayo
For the mayonnaise
1/2 cup of store-bought mayonnaise
1 tablespoon chopped fresh tarragon
1 tablespoon lemon juice
1/2 tablespoon lemon zest
salt and pepper to taste
For the sandwich
Claw and tail meat from two 1 1/2 pound steamed lobsters (Most grocery stores steam them for free sparing you an unpleasant scene in the kitchen.)
12 slices of good quality bacon
One tomato, sliced thin
Eight leaves of Boston lettuce
Eight thick slices of the bread of your choice, toasted (I used challah; the sweetness worked nicely with the tartness of the tarragon-lemon mayo.)
Combine the ingredients for the mayonnaise a couple of hours before you plan to serve the sandwiches and let it sit in the refrigerator to allow the flavors to come together.
Shell the lobster. Slice the tail meat into 1/4-inch thick discs and roughly chop the claw meat.
Cook the bacon so that it is crisp but not burnt.
Assemble the sandwiches by slathering the toast with mayo, piling on lobster and topping it with two leaves of lettuce, three slices of bacon and tomato.
Cut the sandwiches in half on the diagonal and enjoy.
Friday, June 17, 2011
Eat: Crispy fish sandwich
I didn't eat a lot of fish growing up, but when my husband and I moved to a fishing city it seemed the thing to do, and I learned to love it. I did not, however, learn to cook it. Fish has long been the last cooking frontier or me, the challenge I thought best left in the hands of the professionals. Recently, though, I got bold.
This crispy, satisfying sandwich is easier and more foolproof than I would have anticipated and it fits the category of fast food made slow, though it's not that slow and I would never actually eat a fast food fish sandwich. Also, my kids eat it, which is beyond shocking and ridiculously satisfying to me.
Crispy Fish Sandwich
For the fish:
2 flounder fillets
salt and pepper
1 cup of flour
1/2 cup of corn meal
1 tablespoon Old Bay Seasoning (optional)
3 eggs
1/4 cups milk
2 cups panko
2 tablespoons of oil (olive, vegetable or canola work)
For the sandwiches:
4 sesame seed rolls
2 tablespoons of butter
lettuce (for sandwiches)
tomato slices
tartar sauce
Prepare the rolls first by heating butter in a non-stick pan, slicing rolls and then browning them in the butter.
Meanwhile, combine the flour, corn meal and seasoning in a shallow and in another shallow bowl whip together the eggs and milk. Pour the panko onto a plate.
Cut the fillets in two, horizontally and season them with salt and pepper. Dredge each piece in the flour mixture, dip in the egg and then coat with panko and set aside.
Heat the oil in a heavy skillet over medium high heat and cook the fish three to four minutes per side. You'll probably have two thicker slices and two thinner pieces; to make things easier, cook the fish in batches, first the thin pieces and then the thick.
Allow the fish to drain on paper towels for a few minutes before assembling the sandwiches.
This crispy, satisfying sandwich is easier and more foolproof than I would have anticipated and it fits the category of fast food made slow, though it's not that slow and I would never actually eat a fast food fish sandwich. Also, my kids eat it, which is beyond shocking and ridiculously satisfying to me.
Crispy Fish Sandwich
For the fish:
2 flounder fillets
salt and pepper
1 cup of flour
1/2 cup of corn meal
1 tablespoon Old Bay Seasoning (optional)
3 eggs
1/4 cups milk
2 cups panko
2 tablespoons of oil (olive, vegetable or canola work)
For the sandwiches:
4 sesame seed rolls
2 tablespoons of butter
lettuce (for sandwiches)
tomato slices
tartar sauce
Prepare the rolls first by heating butter in a non-stick pan, slicing rolls and then browning them in the butter.
Meanwhile, combine the flour, corn meal and seasoning in a shallow and in another shallow bowl whip together the eggs and milk. Pour the panko onto a plate.
Cut the fillets in two, horizontally and season them with salt and pepper. Dredge each piece in the flour mixture, dip in the egg and then coat with panko and set aside.
Heat the oil in a heavy skillet over medium high heat and cook the fish three to four minutes per side. You'll probably have two thicker slices and two thinner pieces; to make things easier, cook the fish in batches, first the thin pieces and then the thick.
Allow the fish to drain on paper towels for a few minutes before assembling the sandwiches.
Friday, June 3, 2011
Eat: Watermelon and Feta Salad
When I was Big E's age I earned honors from the Good Eater club at my school every week. Clearly this was before childhood obesity was a concern, because I earned this accolade by choking down all of my American Chop Suey, canned pears in a paper cup, waxed beans or whatever else was slopped on my plate in the cafeteria line. I didn't enjoy the food and some days I would struggle mightily to clean my plate, but I was highly motivated by the little paper apple, fresh from the mimeograph, that was my reward and so I made it work.
My husband and especially my daughters lack this ability to soldier through a meal. If they aren't fans of a particular food, no amount of insisting, coercion or pleading makes any difference; as a result, I don't bother making a lot of my favorites because there seems no sense in preparing a dish that only I will eat. This salad is the one exception to that. I am the only one in the house who eats it, but I love it so much that not only do I make it but I actually spent my precious alone time between leaving work and volunteering in Big E's class today going to the store for ingredients and assembling this salad.
It's so easy that you don't really need a recipe, but here it is in all its summery, sweet-salty glory:
Watermelon and Feta Salad
1/2 watermelon, cut into bite-sized chunks
1/2 cup of crumbled feta
2 handfuls of baby arugula
fresh ground black pepper (to taste)
In a large bowl, toss together the watermelon and feta. Season with pepper, then toss in the argula. Allow it to sit for at least 30 minutes before serving, so the flavors can mingle.
Thursday, May 19, 2011
Eat: Tarragon and Bacon Scallops on Crispy Polenta Cakes
I love to eat out, but over the years I've find many a foreign object in my meals: a pencil-top eraser in a Greek salad, a twist tie in a chicken sandwich, an eyelash on an Egg McMuffin, a disturbingly short and curly hair on a cheeseburger, and flies, so many flies.
Since I had kids, my restaurant discoveries have dropped off significantly, maybe a stray hair here and there but nothing really exciting. I doubt this is because food handling has become so much more sanitary since 2003. It is much more likely because eating out with my children simply doesn't allow for leisurely contemplation (and inspection) of my food.
The possibility of unseen eyelashes and erasers, the overpriced kids' meals that are pushed away after two bites, and the extra-large tips we must occasionally offer in apology to our server have taken some of the joy out of restaurant dining, and so we've cut back. Every once in a while, though, I manage a meal that is restaurant quality, free of unfamiliar hairs, and can be enjoyed without worrying whether we're going to exceed the time limit on our restaurant manners.
Last weekend I managed this with a meal of Tarragon and Bacon Scallops on Crispy Polenta Cakes, arugula tossed in balsamic vinaigrette, and brownies a la mode with homemade chocolate sauce. The scallops are surprisingly simple to prepare and the polenta cakes are made easier by using a pre-cooked roll, and all of it is delicious.
Polenta Cakes
Preheat the oven to 350.
Slice the polenta into half-inch thick rounds.
Heat the olive oil in a non-stick pan over medium-high heat.
Brown the cakes in the olive oil. This took me about three minutes per side.
Place the cakes on a baking sheet lined with parchment paper and bake for about 20 minutes, about the time it will take you to prepare the scallops.
Tarragon and Bacon Scallops
Pat the scallops dry and season them with salt and pepper.
Cook the bacon until it is crispy but not overdone. Remove it to a paper towel-lined plate.
Add the butter to the pan with the bacon grease and melt it over medium heat.
Sear the scallops over medium-high heat for about 2 1/2 minutes a side.
Remove the scallops from the heat, slice them in half lengthwise, put them on a plate and cover them.
Add the wine and lemon juice to the pan and bring to a simmer as you gently scrape up any bits of bacon and scallops that remain stuck to the pan.
Once the wine and lemon juice mixture has reduced by about half, add two tablespoons of water and allow that to reduce a bit.
Return the bacon and the scallops (and any juices they've released on the plate) to the pan and add the tarragon. Stir together, allowing all of the components to heat up and mingle together.
Season with salt and pepper to taste, and then serve over polenta cakes.
This served two adults with left overs and some for the kids to try.
Quick Baby Arugula Salad
Combine two tablespoons of balsamic vinegar, one tablespoon of olive oil and salt and pepper to taste in the bottom of a medium salad bowl. Whisk it all together, add a bowlful of baby arugula, and toss to coat.
- 1 tube of pre-cooked polenta (I used one flavored with garlic and basil.)
- 1 tablespoon of olive oil
Preheat the oven to 350.
Slice the polenta into half-inch thick rounds.
Heat the olive oil in a non-stick pan over medium-high heat.
Brown the cakes in the olive oil. This took me about three minutes per side.
Place the cakes on a baking sheet lined with parchment paper and bake for about 20 minutes, about the time it will take you to prepare the scallops.
Tarragon and Bacon Scallops
- 2 slices of thick cut bacon, cut into 1 inch bits (Kitchen scissors work well for this.)
- 10 sea scallops
- 2 tablespoons of unsalted butter
- juice of one lemon
- 1/4 cup of white wine
- 1 tablespoon chopped fresh tarragon
- Salt and pepper
Pat the scallops dry and season them with salt and pepper.
Cook the bacon until it is crispy but not overdone. Remove it to a paper towel-lined plate.
Add the butter to the pan with the bacon grease and melt it over medium heat.
Sear the scallops over medium-high heat for about 2 1/2 minutes a side.
Remove the scallops from the heat, slice them in half lengthwise, put them on a plate and cover them.
Add the wine and lemon juice to the pan and bring to a simmer as you gently scrape up any bits of bacon and scallops that remain stuck to the pan.
Once the wine and lemon juice mixture has reduced by about half, add two tablespoons of water and allow that to reduce a bit.
Return the bacon and the scallops (and any juices they've released on the plate) to the pan and add the tarragon. Stir together, allowing all of the components to heat up and mingle together.
Season with salt and pepper to taste, and then serve over polenta cakes.
This served two adults with left overs and some for the kids to try.
Quick Baby Arugula Salad
Combine two tablespoons of balsamic vinegar, one tablespoon of olive oil and salt and pepper to taste in the bottom of a medium salad bowl. Whisk it all together, add a bowlful of baby arugula, and toss to coat.
Thursday, May 5, 2011
Eat: Beer Bread
You may have noticed that not long after I bragged about my new healthy eating project, I also shared recipes for ribs, ice cream pie, pizza and brownies. I swear I still have a (passing) interest in eating more vegetables and whole grains, but lately I've been more into the beer, bread and tons of melted butter involved in this recipe.
I first saw this recipe from Sara Moulton's Everyday Family Dinners last summer. I was tempted but never got around to making it. I'm thinking that it's all of the whole grains of late that inspired me to try this bread made of white flour and sugar. Whatever the reason, I am forever grateful that I did because it is extremely easy and so delicious.
Whisk together the dry ingredients in a large bowl.
Mix it together until just combined. You'll end up with a sticky, messy dough, but don't worry. It will work out in the end.
I first saw this recipe from Sara Moulton's Everyday Family Dinners last summer. I was tempted but never got around to making it. I'm thinking that it's all of the whole grains of late that inspired me to try this bread made of white flour and sugar. Whatever the reason, I am forever grateful that I did because it is extremely easy and so delicious.
- 3 cups unbleached flour
- 3 tablespoons of sugar
- 1 tablespoon of baking powder
- 1 teaspoon of salt
- 1 stick of unsalted butter
- 1 bottle of beer (Blue Moon has worked well for me.)
Whisk together the dry ingredients in a large bowl.
Add the bottle of beer.
Mix it together until just combined. You'll end up with a sticky, messy dough, but don't worry. It will work out in the end.
Once the butter is melted, pour out about 3/4 of it into a small bowl. Swirl the rest around to coat the inside of the pan(carefully because the pan will be hot). Use a rubber spatula to spread the dough out evenly in the pan, then drizzle the rest of the melted butter over the dough.
Cook it at 350 for about 25 minutes until it is golden brown in top. Allow it to cool a bit, then cut it into squares and serve while it is still warm.
Thursday, April 21, 2011
Eat: Brownies, beyond the box
Until about seven years ago, I thought that the only way to make brownies was to start with the sack of brown powder provided by Duncan Hines and then follow the directions on the box.
One day when I was feeling particularly adventurous, I decided to take on the herculean task of making brownies from scratch. Imagine my surprise when I used the Brownies Cockaigne recipe from The Joy of Cooking and realized it was just as easy as using a mix. I felt empowered, and to this day I credit that brownie-baking breakthrough for my determination to cook from scratch whenever possible.
As much as oatmeal chocolate chip cookies are my sentimental favorite, these brownies are easier to pull together on the spur of the moment, like Little E and I did to celebrate my finishing my grades on time. These brownies are great for customization --bake them as mini cupcakes, frost them, top them with leftover Halloween candy. This time we went the festive route with Cadbury's mini eggs.
Please know that if you're a cakey-brownie person, we have some fundamental differences and these may not be for you.
Brownies Beyond the Box
adapted from The Joy of Cooking
Chop the chocolate and cut the butter into chunks, placing all of it into a medium-sized microwave safe bowl.
Melt the butter and chocolate together by heating in 30 second intervals, stirring in between until they are fully combined.
Allow this mixture to cool until it is no longer hot --warm is okay, just not hot.
Add the sugar and vanilla and stir until combined.
Add the eggs and stir until they are fully incorporated into the chocolate and sugar.
Add the flour and stir until just combined. Make sure that you don't see any lingering flour, but don't overmix it.
Mix in nuts if you're using them, or just spread the batter into the prepared pan. If you want to top with candy like we did, considering freezing it (like we didn't) so that it will hold its shape better.
Cook for about 25 minutes and check with a toothpick. Remove them when the toothpick comes out clean.
Let the brownies sit in the pan for about five minutes and then use the foil overhang to remove them. Allow them to cool completely before removing the foil and cutting the brownies.
One day when I was feeling particularly adventurous, I decided to take on the herculean task of making brownies from scratch. Imagine my surprise when I used the Brownies Cockaigne recipe from The Joy of Cooking and realized it was just as easy as using a mix. I felt empowered, and to this day I credit that brownie-baking breakthrough for my determination to cook from scratch whenever possible.
As much as oatmeal chocolate chip cookies are my sentimental favorite, these brownies are easier to pull together on the spur of the moment, like Little E and I did to celebrate my finishing my grades on time. These brownies are great for customization --bake them as mini cupcakes, frost them, top them with leftover Halloween candy. This time we went the festive route with Cadbury's mini eggs.
Please know that if you're a cakey-brownie person, we have some fundamental differences and these may not be for you.
Brownies Beyond the Box
adapted from The Joy of Cooking
- 4 oz. unsweetened chocolate
- 1 stick of unsweetened butter
- 2 cups of sugar
- 1 teaspoon of vanilla
- 4 eggs
- 1 cup of all-purpose flour
- 1 cup of chopped walnuts (optional)
Chop the chocolate and cut the butter into chunks, placing all of it into a medium-sized microwave safe bowl.
Melt the butter and chocolate together by heating in 30 second intervals, stirring in between until they are fully combined.
Allow this mixture to cool until it is no longer hot --warm is okay, just not hot.
Add the sugar and vanilla and stir until combined.
Add the eggs and stir until they are fully incorporated into the chocolate and sugar.
Add the flour and stir until just combined. Make sure that you don't see any lingering flour, but don't overmix it.
Mix in nuts if you're using them, or just spread the batter into the prepared pan. If you want to top with candy like we did, considering freezing it (like we didn't) so that it will hold its shape better.
Cook for about 25 minutes and check with a toothpick. Remove them when the toothpick comes out clean.
Let the brownies sit in the pan for about five minutes and then use the foil overhang to remove them. Allow them to cool completely before removing the foil and cutting the brownies.
Thursday, March 24, 2011
Eat: Monday Night Pizzas
Sometimes I think that the universe handed me Monday nights to teach me a lesson about appreciating what I have.
Mondays are when the childrens' activities all converge, my husband has an evening class and all falls to me. I am responsible for the carting around, the coordinating, the refereeing, the cleaning, the overseeing of homework, and the feeding, all while trying to ease back into my own work week.
When I find myself coveting, say, roomy new construction on a cul-de-sac, an island vacation over February break, or maybe a grocery budget that allowed for the purchase of brand name cereals, I remind myself of Mondays because I'd rather do without on my husband's teacher salary than take on more than one day a week as the only grown-up on kid duty in exchange for travelling, suit-wearing money.
This pizza has kept me from feeling like a complete failure on those Monday evenings. Sure, I use prepared sauces, but it doesn't come out of the freezer and it didn't appear from the drive-thru window, and it even allows for a little quality time during the preparation. On a Monday that's more than I could ask for.

Monday Night Pizza
the crust:
3 cups of unbleached all-purpose flour
1 cup warm water
1 packet rapid rise yeast
1 teaspoon of honey
1 teaspoon of kosher salt
1 tablespoon of olive oil (plus more for brushing before baking)
cornmeal for dusting the cooking surface
the sauce:
prepared pizza sauce and/or prepared pesto sauce
the cheese and toppings:
2 cups of shredded mozzarella and/or several slices of fresh mozzarella
Optional toppings: fresh herbs, sliced tomatoes, prosciutto, pepperoni, leftover roasted vegetables, pretty much anything that sounds good to you
to make the dough:
Because of the rising time involved, I make the dough a day ahead and have made it as many as three days ahead with good results.

Mondays are when the childrens' activities all converge, my husband has an evening class and all falls to me. I am responsible for the carting around, the coordinating, the refereeing, the cleaning, the overseeing of homework, and the feeding, all while trying to ease back into my own work week.
When I find myself coveting, say, roomy new construction on a cul-de-sac, an island vacation over February break, or maybe a grocery budget that allowed for the purchase of brand name cereals, I remind myself of Mondays because I'd rather do without on my husband's teacher salary than take on more than one day a week as the only grown-up on kid duty in exchange for travelling, suit-wearing money.
This pizza has kept me from feeling like a complete failure on those Monday evenings. Sure, I use prepared sauces, but it doesn't come out of the freezer and it didn't appear from the drive-thru window, and it even allows for a little quality time during the preparation. On a Monday that's more than I could ask for.
Monday Night Pizza
the crust:
3 cups of unbleached all-purpose flour
1 cup warm water
1 packet rapid rise yeast
1 teaspoon of honey
1 teaspoon of kosher salt
1 tablespoon of olive oil (plus more for brushing before baking)
cornmeal for dusting the cooking surface
the sauce:
prepared pizza sauce and/or prepared pesto sauce
the cheese and toppings:
2 cups of shredded mozzarella and/or several slices of fresh mozzarella
Optional toppings: fresh herbs, sliced tomatoes, prosciutto, pepperoni, leftover roasted vegetables, pretty much anything that sounds good to you
to make the dough:
Because of the rising time involved, I make the dough a day ahead and have made it as many as three days ahead with good results.
- Dissolve the honey in 1/4 cup of tap water that is very warm but not hot. I don't have a thermometer but judge it by sticking my finger in the flow from the tap; when it feels very warm but not so hot that I want to pull my finger from the stream, it's good.
- Add the yeast to the water and honey. Within about five minutes the yeast should appear foamy.
- While you are waiting for the yeast, mix the flour and salt in the bowl of a stand mixer using the paddle attachment.
- When the yeast is ready, pour it into the flour and salt mixture, along with 3/4 cup warm tap water and the tablesoon of olive oil. Mix with the paddle attachment until just combined.
- Switch to the dough hook and mix on slow speed for a few minutes, until the dough creeps up the hook.
- Remove the dough to a lightly oiled bowl. Turn the dough so that it, too, is lightly oiled and cover with a clean dish towel. Leave it to rise for an hour; it should approximately double in size.
- Knead the dough back down to size on a floured cutting board and then slice the ball into four equal pieces. Roll the four pieces into balls, line them up on the cutting board, cover with a dampened dishcloth and allow them to rise for another hour.
- Knead the dough balls bak down to size, wrap individually and refrigerate.
- Preheat the oven to 500.
- Prepare two cookie sheets by lightly spraying with olive oil or cooking spray and dusting with corn meal.
- Roll out the dough on a floured surface, making four rounds, and put two on each cookie sheet.
- Brush each round with a light coating of olive oil. The kids like to do this part. Once I've rolled out the dough, I let them join me but usually lay out the cheese and toppings ahead of time so that I can contain the mess as much as possible.
Use the back of a spoon to spread a thin layer of sauce on each pizza. The kids like traditional pizza sauce and my husband and I usually have pesto.
- Top with cheese --shredded mozzarella for the girls, fresh for my husband and I. (Use the fresh mozzarella sparingly as the high moisture content can make it messy when it melts.) Add any additional toppings along with the cheese.
- Bake for 10-15 minutes, until the cheese is melted and the crust is golden brown.
- Let it rest for a few minutes before cutting and serving so that the cheese stays intact. Kitchen shears are great for the slicing.
Thursday, March 10, 2011
Eat: Roasted Vegetable Lasagna Margherita
Four weeks of my healthy dinner project and I'm still sticking to it. I'm kind of amazed.
In addition to the Butternut Squash and Black Bean Burritos that I shared here, we've had Roasted Squash Parmesan with Broccoli Rabe and Quinoa in Vinaigrette, and Homemade Whole Wheat Flatbread topped with Sauteed White Beans and Tomatoes and Frizzled Prosciutto.
My favorite so far, though, has been this lasagna, which brings the combination of tomatoes, fresh mozzarella and basil that I love on pizza margherita to a baked pasta. It's also packed with vegetables and uses whole grain pasta, so despite the cheesy goodness I'm calling it healthy.
Big E actually managed to eat some --without gagging! And Little E? Well, she (eventually) took the required three bites. No comment on the gagging.
2 small eggplants, peeled and cut into bite sized chunks
2 small zucchinis, peeled and cut into bite-sized chunks
3 red or green bell peppers, seeds and ribs removed and cut into bite-sized pieces
3 tablespoons of olive oil (plus extra to grease baking dish
2 28 oz. cans of whole tomatoes, drained
1/4 cup fresh basil, chopped
3 cloves of garlic, minced or pressed
16 oz. part-skim ricotta cheese
3 oz. baby spinach
1 egg
1/2 teaspoon of salt
About 4 oz. fresh mozzarella, cut into 12 thin slices
1 box whole wheat lasagna noodles
freshly parmigiana reggiano for serving (optional)
In addition to the Butternut Squash and Black Bean Burritos that I shared here, we've had Roasted Squash Parmesan with Broccoli Rabe and Quinoa in Vinaigrette, and Homemade Whole Wheat Flatbread topped with Sauteed White Beans and Tomatoes and Frizzled Prosciutto.
My favorite so far, though, has been this lasagna, which brings the combination of tomatoes, fresh mozzarella and basil that I love on pizza margherita to a baked pasta. It's also packed with vegetables and uses whole grain pasta, so despite the cheesy goodness I'm calling it healthy.
Big E actually managed to eat some --without gagging! And Little E? Well, she (eventually) took the required three bites. No comment on the gagging.
Roasted Vegetable Lasagna Margherita
2 small eggplants, peeled and cut into bite sized chunks
2 small zucchinis, peeled and cut into bite-sized chunks
3 red or green bell peppers, seeds and ribs removed and cut into bite-sized pieces
3 tablespoons of olive oil (plus extra to grease baking dish
2 28 oz. cans of whole tomatoes, drained
1/4 cup fresh basil, chopped
3 cloves of garlic, minced or pressed
16 oz. part-skim ricotta cheese
3 oz. baby spinach
1 egg
1/2 teaspoon of salt
About 4 oz. fresh mozzarella, cut into 12 thin slices
1 box whole wheat lasagna noodles
freshly parmigiana reggiano for serving (optional)
- Heat the oven to 450.
- Toss the vegetables with one tablespoon of olive oil, lay out in a single layer on two cookie sheets covered with foil and roast in the oven, stirring occasionally, for about 20 minutes or until well-browned and softened. You can multi-task by preparing the ricotta, starting the sauteed tomatoes and prepare the pasta while the vegetables roast.
- To prepare the ricotta mixture: put ricotta, salt, spinach and egg into a food processor and whir until completely combined. It will look bright green, but after Big E was convinced to try it she confirmed that it doesn't actually taste like spinach.
- For the sauteed tomatoes, remove tomatoes from the can juices and lightly mash them with the back of a fork, cutting them if necessary to make the chunks bite-sized. Heat two tablespoons of oil. Add the garlic and saute it until it is fragrant and lightly browned. Add tomatoes and cook until they are warmed through and juices are reduced. Add two tablespoons of chopped basil and stir through. Remove from the heat.
- Prepare pasta according to package instructions.
- Grease the bottom of a 9x13 baking dish with olive oil, and cover it with a layer of pasta, overlapping the pieces slightly if necessary.
- Spread half of the sauteed tomatoes over the pasta layer, then evenly pour all of the ricotta mixture on top of the tomatoes. Distribute the roasted vegetables over the ricotta mixture. Cover the vegetables with a second layer of pasta. Spread the remaining tomatoes over pasta. Place the mozzarella slices in three rows of four and sprinkle with chopped basil.
- Cover with foil and bake at 350 for 30 minutes. Bake for an additional 5 minutes uncovered. Remove from the oven and allow the lasagna to rest for at least 5 minutes before slicing and serving.
Thursday, February 24, 2011
Eat: Squash and Black Bean Burritos with Cilantro-Lime Yogurt Sauce
Last week Little E wanted to try my orange and was shocked to find that she couldn't bite right into the skin as if it were an apple. Big E told me that she'd like to become a "meatatarian." Clearly a re-dedication to healthy eating was in order.
If only I knew what that meant.
As a kid, I thought anything on a salad bar was healthy. Lettuce, tomatoes, baby corn on the cob, baco-bits, shredded cheese, Ranch dressing: I considered them equally nutritious by virtue of their home under the sneeze guard.
By the time I was in high school, I had learned to fear fat. A "healthy" lunch might include jelly beans and oyster crackers. Also diet pills.
In college I realized that sugar was just as unhealthy as fat. As such, I came to live on Snackwells devil's food cookies, which I now realize are probably just as lacking in nutritional value as their flavor-profile doppelganger, corrugated cardboard infused with chemicals.
After Big E was born I decided to "get healthy" (i.e. back in my jeans) on South Beach. I bought the book and was a zealous convert until the morning I woke up shaking and dry heaving, barely able to lift Big E to nurse. I weepily called my father, who had briefly joined me in my low-carb exploits. "Put the baby in the carseat," he told me calmly, "get in the car and go to the Dunkin Donuts drive-through." I scarfed down a bagel and a blueberry muffin right there in the parking lot and never looked back.
After Little E was born I counted Weight Watchers points online and found that I could achieve "healthy" weight loss on a diet of Wendy's hamburgers and Snicker's-flavored Kudos bars.
My plan this time around is simpler (and yet so much harder). Once a week we'll eat a meal heavy on a variety of vegetables and whole grains and light on meat, eggs, dairy and pre-packaged foods. With any luck, some of the dishes I prepare on this night will make it into our regular rotation and before long we'll be eating healthy full-time.
One of my early attempts was this burrito, which my husband and I loved for its unexpected, yet totally complementary flavor pairing. And which the girls greeted with the same shudder of horror I might have expected if I'd served them a plate of dog vomit.
It's a process. Right?
Black Bean and Squash Burritos with Cilantro-Lime Yogurt Sauce
for the burritos:
2-3 cups of cooked brown rice (more or less depending on how much you like in your burrito)
4 large whole wheat tortillas
1 25 oz. can of black beans, drained and thoroughly rinsed
1 poblano pepper (you may want more here, but the kids don't like spicy)
1 butternut squash, peeled and cut into 2-inch chunks
1 medium yellow onion, chopped
2 cups chopped fresh baby spinach
3 tbsp. water
2 tbsp. of olive oil
2 tbsp. chopped fresh cilantro
1 tsp. cumin
1 tsp. salt
1/2 tsp. coriander
for the sauce:
8 oz. fat free Greek yogurt
juice of two limes
1 tbsp. chopped fresh cilantro
1 tsp. salt
Preheat the oven to 450.
Make the sauce by whisking the yogurt, lime juice, cilantro and salt until smooth.
Toss the squash with one tablespoon of oil in a shallow baking dish and roast it for 20-25 minutes or until fork tender.
While the squash is cooking, fire-roast the poblano. I did this on the stovetop by rinsing the pepper but not drying it, putting it on a metal skewer and holding it over the flame until its skin was evenly darkened and thoroughly blistered on all sides --kind of like roasting a marshmallow. You could probably do the same under the broiler or on the grill. Once it's roasted, let it sit until it's cool enough to handle. At this point you can remove the skin by using a paper towel to gently rub it off. Be sure to wash your hands when you're done.
While the pepper is cooling, heat the remaining tablespoon of olive oil in a heavy skillet and saute the onions until they're softened. Then, add the beans, water, cumin, coriander and allow the mixture to simmer over low heat, stirring occasionally.
Cut open the (now skinless) poblano, remove all of its seeds and then dice it.
Heat up the rice, if necessary, prepare the tortillas as directed on the package, and wilt the spinach with 30 seconds in the microwave.
Fill each tortilla with rice, beans, squash, spinach, diced poblano and a sprinkling of cilantro (in whatever proportion pleases you), fold and serve with sauce.
Thursday, February 10, 2011
Eat: Oatmeal Chocolate Chip Cookies, with love
Valentine's Day is coming, so I wanted to share an appropriate recipe, some edible version of sparkly hearts and long stemmed red roses. Something romantic. Something sexy. And I came up with...absolutely nothing.
Then I thought about these cookies. I have made them countless times over the years, and they are neither romantic nor sexy. They are better than that.
These are the cookies that I make when one of the girls needs some extra mothering or when my husband has been shouldering more than his fair share of my ire. I've also been known to come home after a rough day and weepingly make a batch of these for myself. When a good friend was dealing with a difficult pregnancy in a far away new town, I mailed her a box. When my aunt died of a cancer that was never supposed to take her, I woke up early the next morning and baked a double-batch for my uncle and cousins.
Soft and comforting, layered with sweetness, these cookies are better than hearts and roses. They are a hug in a box, love on a baking sheet.
Oatmeal Chocolate Chip Cookies
1 1/2 cups of unbleached all-purpose flour
1 teaspoon of baking soda
1 teaspoon of salt
1 cup of unsalted butter (at room temperature)
3/4 cup granulated sugar
3/4 cup light brown sugar
1 tsp. vanilla extract
2 eggs (at room temperature)
2 1/2 cups of old fashioned oats
1 cup of sweetened shredded coconut
12 oz. semi-sweet chocolate chunks
3/4 cup of Heath Bar bits
- Preheat the oven to 350 and cover cookie sheets with parchment or foil.
- Whisk together flour, baking soda, and salt in a medium size bowl and set aside.
- Cream butter and sugars until light and fluffy. A stand mixer is your best bet, as the better gets pretty thick, but a hand mixer will work if you use a large bowl.
- Mix in the vanilla and eggs.
- Add the flour mixture and beat until just combined.
- Add the oats and coconut and mix until just combined. (If you are using a hand mixer, you may want to do this part gradually.)
- Add the chocolate chunks and and Heath Bar bits and mix until just combined.
- Use a standard ice cream scoop or measuring cup to drop batter by the quarter cup onto the prepared cookie sheets.
- Bake until just golden brown, about 16 minutes.
- Allow the cookies to sit for five minutes on the cookie sheet before removing them to a cooling rack.
Labels:
Eat,
love,
oatmeal chocolate chip cookies,
Valentine's Day
Thursday, January 27, 2011
Eat: Surplus Thin Mint Ice Cream Pie with Minty Whipped Cream
I never rushed a sorority. The thought of a gang of pajama-clad girls staying up late into the night to systematically scrutinize my small talk, my wardrobe my reputation-- it was more than I could manage at the time. But I sometimes regret missing out on all of the sisterly bonding, so when I found out that in Daisy Girl Scouts Big E could have all the trappings of sorority life --songs about friendship, a special pin, appliqued letters (well, daisy petals actually)-- and with none of the ugliness of rush week and pledging, I enthusiastically signed her up.
And then I discovered the catch. It's the cookies. I do love Girl Scout cookies, but come next month we will own more than even I can manage. So when I found a box of last year's Thin Mints still in the freezer, I got inventive in advance of the coming onslaught.
This ice cream pie maintains the choco-minty deliciousness of the cookies but fancies them up a bit. It is also pretty easy (though it requires some freezing time), and its chocolate sauce and minty whipped cream are great for non-pie use, as well.
Surplus Thin Mint Ice Cream Pie with Minty Whipped Cream
for the pie:
1 12 oz. bag of semisweet chocolate chip
1 cup of heavy cream
1 teaspoon of insant coffee crystals, crushed to a powder
1/2 teaspoon vanilla extract
1 store-bought chocolate cookie crumb pie crust
Approximately 20 Thin Mints, 10 of them crushed
1 pint of chocolate ice cream
1 pint of mint chocolate chip ice cream
for the whipped cream
1 cup of chilled heavy cream
1 tablespoon of sugar
1/2 teaspoon of peppermint extract
- First prepare the chocolate sauce. In a small saucepan, heat one cup of cream until simmering. Remove from the heat and quickly whisk in the chocolate chips, coffee crystals and vanilla extract. Set it aside and allow it to cool.
- Meanwhile, soften the chocolate ice cream until it is soft and spreadable. I used the microwave, working at 15 second intervals until it was soft enough to spread smoothly into the pie shell without cracking it.
- Once you've filled the pie crust with chocolate ice cream, cover it with plastic wrap and freeze it for about 30 minutes. To prevent ice crystals from forming, gently press the plastic wrap onto the surface of the ice cream.
- After the ice cream has firmed up, evenly sprinkle the crushed Thin Mints over the surface, then drizzle about 1/3 of the chocolate sauce over the top of the pie, until it is covered. Store the remaining sauce by putting the cover on the pan and putting it straight into the refrigerator; this will save you time when you re-heat.
- Place even scoops of the mint chocolate chip ice cream around the edge of the pie, then place whole Thin Mints between the scoops. Rewrap the pie in plastic wrap and return to the freezer for at least two hours.
- When you are just about ready to serve the pie, take it out of the freezer and let it sit while you re-heat the remaining sauce over low heat, stirring frequently. Remove it from the heat when it is warm but not hot.
- Once the sauce is ready, make the whipped cream by pouring all of the ingredients in a bowl and whipping with a hand mixer or stand mixer until fluffy. The cream should be stiff enough to hold a peak.
- Slice the pie and serve with whipped cream and chocolate sauce. A tip: Immediately before slicing, run hot water over your knife and then dry it off; this warms the metal and makes for an easier cut.
Thursday, January 6, 2011
Eat: Fast food made slow
I've written about my family's occasional over-dependence on McDonald's. But there's something that I may have failed to mention: McDonald's and I have a past.
From the summer before my senior year in high school to the summer before my freshman year in college (and during a really low couple of weeks over that first Christmas break), I was a not-so-proud McDonald's crew member. Sharing this feels only slightly less revealing than posting bikini shots might. I only told my now-husband after we'd been dating over a year, and I introduced my confession with so much tortured fanfare that I'm pretty sure he thought I was about to tell him that I'd slept with his roommate or had a communicable rash.
I spent my high school years as a scholarship student at a private day school where summer jobs consisted of "helping out" in one's father's office or caddying at the club, and careers in fast food were regarded with the same patrician disdain as things like aerosol hairspray and work boots. Sadly, I needed to work and an exhaustive job search turned up only one offer. It occurs to me now that if I'd found the gumption to simply own this fact, my classmates would have been understanding and I would have been much happier; unfortunately, I lacked the moxie that would have required and so, taking advantage of the fact that I lived and worked nearly an hour from my school, I kept it a secret from all but my two closest friends.
I was like an angsty, self-hating teen super hero. By day, I was just a mildly-anorectic, extremely self-conscious prep school girl, blushing deeply with secret shame at any mention of fast food, but 8 to 16 hours a week I became a barely competent, thoroughly mortified McDonald's counter girl, wishing to God I could land something a little more respectable like bagging groceries. I would casually enter the restaurant with my uniform and visor tucked discretely in a Gap duffel, glance furtively over my shoulder, quickly punch in the employee's only door code and disappear to the downstairs changing room only to emerge through that same employee entrance eight hours later, looking the same, only a little greasier and more fragrant.
Because I didn't go to school with my fellow crew members I had an air of mystery, but there had been some confusion and many thought that I attended a local vocational academy. Occasionally, when work was slow someone would ask me about this. When I explained the mix-up, the response, generally delivered with a smirk, would usually be something along the lines of, "Well, that makes more sense. I couldn't really picture you in a welding mask/ a hard hat/ shop glasses." This was much nicer (and more G-rated) than what the store manager reportedly told the grill boys he couldn't picture me doing, which was gleefully recounted for me by one of those boys on a date that included drinking wine coolers in his sub-compact and driving through the woods to find a field where he was cultivating a marijuana plant that he felt showed great promise.
So why am I now revealing this, the ignominious golden M etched on my soul? Because it is all prologue to the New Year's Eve dinner that allowed me to finally come to terms with all this high-low duality --at least in a culinary sense.
My menu was inspired by this "Make Your Own McRib" recipe from Saveur, which replaces the rib-shaped pork patty with braised pork belly. I followed it to the letter (except for cheating with store-bought pickles), and found it deliciously successful. I also made baked sweet potato "fries" and, because the girls aren't McRib-eaters, homemade chicken nuggets. Everyone was happy, though Little E did ask me what the toy was in her homemade happy meal
Baked Sweet Potato "Fries"
2 or 3 good-sized sweet potatoes
1 tablespoon of olive oil
1 tablespoon light brown sugar
salt
Peel the potatoes and cut them into fries about 1/4 inch thick and 3 inches long.
Fill a large bowl with water and soak the fries for about 10 minutes, as you preheat the oven to 425. The soaking helps them to cook more quickly.
Drain the fries, dry out the bowl, return the fries to the bowl, toss them with the olive oil and salt them.
Spread the fries in a single layer on a baking sheet and put into the oven.
Stir and flip the fries occasionally. They took about 25 minutes for me.
When the fries are ready, remove them from the oven and toss them in a large bowl with the brown sugar.
Chicken Nuggets
1 pound of chicken tenderloin pieces, cut into "nugget-size" bites
2 eggs
1 cup of flour
1 1/2 cups of panko bread crumbs
2 tablespoons of olive oil (plus more as needed)
Beat the eggs with a tablespoon of water in a shallow bowl.
Dredge the chicken in flour.
Dip the floured chicken pieces into the egg and then coat with panko.
Allow the chicken to sit for about ten minutes; this seems to help the coating to adhere.
Heat olive oil in a cast iron skillet over medium heat. Be sure that you allow it to heat up enough. I did not and my first batch was a bit rare --not attractive in a chicken nugget.
Cook the nuggets in batches. They take about 4 minutes per side, depending on thickness.
Be sure to replenish the oil as needed.
From the summer before my senior year in high school to the summer before my freshman year in college (and during a really low couple of weeks over that first Christmas break), I was a not-so-proud McDonald's crew member. Sharing this feels only slightly less revealing than posting bikini shots might. I only told my now-husband after we'd been dating over a year, and I introduced my confession with so much tortured fanfare that I'm pretty sure he thought I was about to tell him that I'd slept with his roommate or had a communicable rash.
I spent my high school years as a scholarship student at a private day school where summer jobs consisted of "helping out" in one's father's office or caddying at the club, and careers in fast food were regarded with the same patrician disdain as things like aerosol hairspray and work boots. Sadly, I needed to work and an exhaustive job search turned up only one offer. It occurs to me now that if I'd found the gumption to simply own this fact, my classmates would have been understanding and I would have been much happier; unfortunately, I lacked the moxie that would have required and so, taking advantage of the fact that I lived and worked nearly an hour from my school, I kept it a secret from all but my two closest friends.
I was like an angsty, self-hating teen super hero. By day, I was just a mildly-anorectic, extremely self-conscious prep school girl, blushing deeply with secret shame at any mention of fast food, but 8 to 16 hours a week I became a barely competent, thoroughly mortified McDonald's counter girl, wishing to God I could land something a little more respectable like bagging groceries. I would casually enter the restaurant with my uniform and visor tucked discretely in a Gap duffel, glance furtively over my shoulder, quickly punch in the employee's only door code and disappear to the downstairs changing room only to emerge through that same employee entrance eight hours later, looking the same, only a little greasier and more fragrant.
Because I didn't go to school with my fellow crew members I had an air of mystery, but there had been some confusion and many thought that I attended a local vocational academy. Occasionally, when work was slow someone would ask me about this. When I explained the mix-up, the response, generally delivered with a smirk, would usually be something along the lines of, "Well, that makes more sense. I couldn't really picture you in a welding mask/ a hard hat/ shop glasses." This was much nicer (and more G-rated) than what the store manager reportedly told the grill boys he couldn't picture me doing, which was gleefully recounted for me by one of those boys on a date that included drinking wine coolers in his sub-compact and driving through the woods to find a field where he was cultivating a marijuana plant that he felt showed great promise.
So why am I now revealing this, the ignominious golden M etched on my soul? Because it is all prologue to the New Year's Eve dinner that allowed me to finally come to terms with all this high-low duality --at least in a culinary sense.
My menu was inspired by this "Make Your Own McRib" recipe from Saveur, which replaces the rib-shaped pork patty with braised pork belly. I followed it to the letter (except for cheating with store-bought pickles), and found it deliciously successful. I also made baked sweet potato "fries" and, because the girls aren't McRib-eaters, homemade chicken nuggets. Everyone was happy, though Little E did ask me what the toy was in her homemade happy meal
Baked Sweet Potato "Fries"
2 or 3 good-sized sweet potatoes
1 tablespoon of olive oil
1 tablespoon light brown sugar
salt
Peel the potatoes and cut them into fries about 1/4 inch thick and 3 inches long.
Fill a large bowl with water and soak the fries for about 10 minutes, as you preheat the oven to 425. The soaking helps them to cook more quickly.
Drain the fries, dry out the bowl, return the fries to the bowl, toss them with the olive oil and salt them.
Spread the fries in a single layer on a baking sheet and put into the oven.
Stir and flip the fries occasionally. They took about 25 minutes for me.
When the fries are ready, remove them from the oven and toss them in a large bowl with the brown sugar.
Chicken Nuggets
1 pound of chicken tenderloin pieces, cut into "nugget-size" bites
2 eggs
1 cup of flour
1 1/2 cups of panko bread crumbs
2 tablespoons of olive oil (plus more as needed)
Beat the eggs with a tablespoon of water in a shallow bowl.
Dredge the chicken in flour.
Dip the floured chicken pieces into the egg and then coat with panko.
Allow the chicken to sit for about ten minutes; this seems to help the coating to adhere.
Heat olive oil in a cast iron skillet over medium heat. Be sure that you allow it to heat up enough. I did not and my first batch was a bit rare --not attractive in a chicken nugget.
Cook the nuggets in batches. They take about 4 minutes per side, depending on thickness.
Be sure to replenish the oil as needed.
Labels:
bad jobs,
chicken nuggets,
Eat,
fast food,
Happy Meals,
McRib,
sweet potato fries
Thursday, December 23, 2010
Eat: Broccoli even my dog can enjoy
Around Thanksgiving, I wrote about my dog's favorite Brussels Sprouts. I was pretty amazed that a dog whose diet consists mainly of raw beef could be enticed by a Brussels Sprout. I am even more in awe, though, of her love of this broccoli recipe, which, unlike the other dish, includes no meat at all.
This Oven Roasted Broccoli recipe by Alton Brown is quick enough for a weeknight and tasty enough even for those of us who are not broccoli fans. What I love about it is the texture; while broccoli is so often served as an oversteamed pile of mush, this is crisp and really flavorful. The stems are truly a revelation. I always thought that stems served only as a cost cutting measure in school cafeterias, augmenting a pile of soggy florets; here, though, they add great texture and with the salt and garlic are almost chip-like.
The dog agrees. If only I could get the kids on board.
Ingredients
1 head of broccoli
1/3 cup of panko
2 tablespoons of olive oil
1/2 tablespoon of kosher salt
1/4 teaspoon of freshly ground black pepper (A pinch of red pepper flakes might be nice here, but I don't think it would sit well with the dog.)
1/4 cup freshly grated parmesan cheese
Preheat the oven to 425.
While the oven heats, chop the broccoli. Start with the stem, slicing it into thin rounds and then break down the top into bite-sized florets.
Chop the garlic into very small pieces. The cook time is short, so you want to make sure that it is small enough to cook through to avoid a raw garlic taste.
Once you've chopped the broccoli and garlic, put it in a large bowl and toss it with the oil, salt and pepper.
Next, pour the panko into a 9x12 cake pan and brown it in the oven. This step wil probably take two minutes. Be attentive, as it burns quickly.
Once the panko is browned, pour it from the pan into the bowl with the broccoli, toss it around and reurn the whole mixture back to the pan. Roast it in the oven for 10 minutes.
While the broccoli is roasting, wipe the bowl clean and add the grated cheese. Save yourself some dishes by grating the cheese directly into the bowl.
After 10 minutes of roasting, return the broccoli to the bowl and toss it with the cheese. If you wish, grate a little additional cheese over the top and serve immediately.
This Oven Roasted Broccoli recipe by Alton Brown is quick enough for a weeknight and tasty enough even for those of us who are not broccoli fans. What I love about it is the texture; while broccoli is so often served as an oversteamed pile of mush, this is crisp and really flavorful. The stems are truly a revelation. I always thought that stems served only as a cost cutting measure in school cafeterias, augmenting a pile of soggy florets; here, though, they add great texture and with the salt and garlic are almost chip-like.
The dog agrees. If only I could get the kids on board.
Ingredients
1 head of broccoli
1/3 cup of panko
2 tablespoons of olive oil
1/2 tablespoon of kosher salt
1/4 teaspoon of freshly ground black pepper (A pinch of red pepper flakes might be nice here, but I don't think it would sit well with the dog.)
1/4 cup freshly grated parmesan cheese
Preheat the oven to 425.
While the oven heats, chop the broccoli. Start with the stem, slicing it into thin rounds and then break down the top into bite-sized florets.
Chop the garlic into very small pieces. The cook time is short, so you want to make sure that it is small enough to cook through to avoid a raw garlic taste.
Once you've chopped the broccoli and garlic, put it in a large bowl and toss it with the oil, salt and pepper.
Next, pour the panko into a 9x12 cake pan and brown it in the oven. This step wil probably take two minutes. Be attentive, as it burns quickly.
Once the panko is browned, pour it from the pan into the bowl with the broccoli, toss it around and reurn the whole mixture back to the pan. Roast it in the oven for 10 minutes.
While the broccoli is roasting, wipe the bowl clean and add the grated cheese. Save yourself some dishes by grating the cheese directly into the bowl.
After 10 minutes of roasting, return the broccoli to the bowl and toss it with the cheese. If you wish, grate a little additional cheese over the top and serve immediately.
Thursday, December 9, 2010
Eat: Peppermint Bark
I recently volunteered to contribute to my very first PTA bake sale. I planned on baking some cookies and reveling in the satisfaction of finally being a full-fledged grown-up. Then the bake sale coordinator e-mailed to thank me in advance for my donation of baked good and something she called "candy treats." And so, because I am not quite a full-fledged grown-up, I panicked.
Candy involves thermometers and, as far as I know, a whole lot of mystery, and yet, I didn't want to fall short of proving myself a responsible community member and sufficiently devoted mother. So, I did some research and came up with a "candy treat" that is suitably festive, but requires no thermometer and less effort than a pan of brownies: Peppermint Bark.
This recipe is so easy that, despite my lifelong aversion to candy canes, I've already made it twice. Little E and my husband like the white chocolate and Big E and --much to my surprise-- I like the dark. It is very reminiscent of a Thin Mint, the only minty food worth eating.
Peppermint Bark
1 12 oz. bag of white chocolate chips
1 12 oz. bag dark chocolate chips (60% cocoa Ghiradelli chips worked well)
12 candy canes
Line two 9x12 pans with foil.
Unwrap the candy canes and put them all in a large zip top bag. Place the bag on a cutting board and then use a mallet or rolling pin to smash them into pieces. This is very satisfying, particularly at this time of year. You don't want the pieces too large, but you also don't want to turn them all to dust. Stop when the largest pieces are no longer than they are wide.
Put a colander over a bowl and in the crushed candy canes, stirring and shaking so that only the larger pieces remain in the colander and all of the smaller bits and dust is in the bowl.
Melt one bag of chips by microwaving for a minute, stirring, then microwaving in 30-second intervals, stirring after each, until the chocolate is smooth. The white chocolate will need more aggressive stirring than the dark, as its consistency tends to be on the chalky side.
Once the chocolate is melted, stir in half of the small candy cane bits and dust from the bowl, then pour and spread the chocolate into the lined pan. Sprinkle half of the bigger chunks from the colander over the melted chocolate, lightly pressing them in so they are firmly affixed.
Repeat with the other bag of chips. Refrigerate both until solid, about 45 minutes.
Finally, remove them from the refrigerator, peel the hardened chocolate from the foil break into pieces. I made mine roughly 2"x2", which seemed a reasonable serving size.
The simple preparation made them a good Christmas "cooking" project to do with the kids on a weekday afternoon, and packaged in little cellophane bags, they made a passable "candy treat" for the bake sale. And panic-free.
Candy involves thermometers and, as far as I know, a whole lot of mystery, and yet, I didn't want to fall short of proving myself a responsible community member and sufficiently devoted mother. So, I did some research and came up with a "candy treat" that is suitably festive, but requires no thermometer and less effort than a pan of brownies: Peppermint Bark.
This recipe is so easy that, despite my lifelong aversion to candy canes, I've already made it twice. Little E and my husband like the white chocolate and Big E and --much to my surprise-- I like the dark. It is very reminiscent of a Thin Mint, the only minty food worth eating.
Peppermint Bark
1 12 oz. bag of white chocolate chips
1 12 oz. bag dark chocolate chips (60% cocoa Ghiradelli chips worked well)
12 candy canes
Line two 9x12 pans with foil.
Unwrap the candy canes and put them all in a large zip top bag. Place the bag on a cutting board and then use a mallet or rolling pin to smash them into pieces. This is very satisfying, particularly at this time of year. You don't want the pieces too large, but you also don't want to turn them all to dust. Stop when the largest pieces are no longer than they are wide.
Put a colander over a bowl and in the crushed candy canes, stirring and shaking so that only the larger pieces remain in the colander and all of the smaller bits and dust is in the bowl.
Melt one bag of chips by microwaving for a minute, stirring, then microwaving in 30-second intervals, stirring after each, until the chocolate is smooth. The white chocolate will need more aggressive stirring than the dark, as its consistency tends to be on the chalky side.
Once the chocolate is melted, stir in half of the small candy cane bits and dust from the bowl, then pour and spread the chocolate into the lined pan. Sprinkle half of the bigger chunks from the colander over the melted chocolate, lightly pressing them in so they are firmly affixed.
Repeat with the other bag of chips. Refrigerate both until solid, about 45 minutes.
Finally, remove them from the refrigerator, peel the hardened chocolate from the foil break into pieces. I made mine roughly 2"x2", which seemed a reasonable serving size.
The simple preparation made them a good Christmas "cooking" project to do with the kids on a weekday afternoon, and packaged in little cellophane bags, they made a passable "candy treat" for the bake sale. And panic-free.
Wednesday, November 24, 2010
Eat: Brussels Sprouts even my dog can enjoy
I don't know many people who consider Brussels Sprouts to be a favorite, which is why I am particularly fond of the Roasted Brussels Sprouts with Lemon and Bacon from the December 2005 issue of Bon Appetit. Not only is it my favorite vegetable side dish, but it is my husband's and, even more impressively, it is my dog's.
The dog is probably swayed by the delicious infusion of bacon, and I agree. Bacon improves anything, especially when it's brightened up with subtle lemon flavor. That it's relatively painless to make is all the better. I'll be roasting up a recipe of these tonight and re-heating them tomorrow while the turkey rests.
Roasted Brussels Sprouts with Lemon and Bacon
1 1/2 pounds of small Brussels Sprouts, trimmed and halved the long way
1 1/4 cups diced raw bacon
1 lemon sliced in half lengthwise, then thinly sliced crosswise
Preheat the oven to 450.
Cook the sprouts in boiling water until crisp-tender (about 5 minutes)
Drain the sprouts and spread them on a rimmed baking sheet.
Toss them with bacon and lemon slices, the sprinkle with salt and pepper.
Cook for 30 minutes, stirring every 10 minutes.
Transfer to a bowl and serve, or transfer to an oven proof dish, refrigerate and serve teh next day. While serving them immediately is preferable, if oven space is at a premium, you can cook ahead and re-heat in the oven as I'm doing without losing much in the way of flavor or texture. They even fare well in the microwave, though the dog prefers them lukewarm.
Happy Thanksgiving.
The dog is probably swayed by the delicious infusion of bacon, and I agree. Bacon improves anything, especially when it's brightened up with subtle lemon flavor. That it's relatively painless to make is all the better. I'll be roasting up a recipe of these tonight and re-heating them tomorrow while the turkey rests.
Roasted Brussels Sprouts with Lemon and Bacon
1 1/2 pounds of small Brussels Sprouts, trimmed and halved the long way
1 1/4 cups diced raw bacon
1 lemon sliced in half lengthwise, then thinly sliced crosswise
Preheat the oven to 450.
Cook the sprouts in boiling water until crisp-tender (about 5 minutes)
Drain the sprouts and spread them on a rimmed baking sheet.
Toss them with bacon and lemon slices, the sprinkle with salt and pepper.
Cook for 30 minutes, stirring every 10 minutes.
Transfer to a bowl and serve, or transfer to an oven proof dish, refrigerate and serve teh next day. While serving them immediately is preferable, if oven space is at a premium, you can cook ahead and re-heat in the oven as I'm doing without losing much in the way of flavor or texture. They even fare well in the microwave, though the dog prefers them lukewarm.
Happy Thanksgiving.
Thursday, November 11, 2010
Eat: Pumpkin Muffins, outside the box
They say breakfast is the most important meal of the day, but ever since I first put Big E into daycare over six years ago, I have seen it more as the most guilt-inducing.
It is the meal that starts the day and that I, as someone whose workday is in full swing at 7:30 a.m., have had to ask others to feed to my children. Eating lunch away from home? That's standard. We all do that. But what kind of mother can't feed her child breakfast? A mother like me, the kind who feels inordinately guilty about it, who thinks that every short stack her kids are deprived of will someday equal an hour on the therapist's couch.
I assuaged my guilt during my extra-large maternity leave after Little E was born. There was fruit and pancakes and whole-wheat waffles shaped like Mickey Mouse --and that was just on the weekdays. When I returned to work I tried to keep this up, to an extent, with homemade muffins that the girls could eat at daycare, but I quickly found that the strife caused by trying to whip up breakfast pastries from scratch acted in opposition to the calm. happy home these muffins were supposed to represent.
I fell to Pillsbury's lure and began buying a box of pumpkin muffin mix and a bag of Hershey's mini-morsels every week to satisfy Big E's love of pumpkin and chocolate. But a few weeks ago, there was a pre-Halloween run on pumpkin muffin mix and it occurred to me that now that I'm working part-time I could get back in the breakfast game --at least part way.
I found this pumpkin muffin recipe from the November 2006 issue of Gourmet Magazine on a blog named, appropriately enough, Muffin Top and followed it with the addition of the beloved mini-morsels.
INGREDIENTS:
1 1/2 cups all-purpose flour
1 tsp baking powder
1 cup canned solid-pack pumpkin
1/3 cup vegetable oil
2 large eggs
1 tsp pumpkin-pie spice (a combo of cinnamon, nutmeg, cloves, ginger, and allspice)
1 1/4 cups plus 1 Tbsp sugar
1/2 tsp baking soda
1/2 tsp salt
1 tsp cinnamon
6 ounces of mini chocolate chips (my addition)
Equipment: 12 foil or paper muffin liners; a muffin pan with 12 (1/2-cup) muffin cups
DIRECTIONS:
Put oven rack in middle position and preheat oven to 350F. Put liners in muffin cups.
Whisk together flour and baking powder in a small bowl.
Whisk together pumpkin, oil, eggs, pumpkin-pie spice, 1 1/4 cups sugar, baking soda, and salt in a large bowl until smooth, then whisk in flour mixture until just combined.
Gently stir in chocolate chips.
Stir together cinnamon and remaining 1 tablespoon sugar in another bowl.
Divide batter among muffin cups (each should be about 3/4 full), then spinkle tops with cinnamon-sugar mixture. Bake until puffed and golden brown and a wooden pick or skewer inserted into center of a muffin comes out clean, 25 to 30 minutes.
Cool in pan on a rack 5 minutes, then transfer muffins from pan to rack and cool to warm or room temperature.
Not only were these almost as easy to make as the mix muffins, they had a delicious cinnamony-sweet topping. The only problem: My grocery store considers canned pumpkin a seasonal item, but the reduction in breakfast-related guilt makes it worth stocking up.
It is the meal that starts the day and that I, as someone whose workday is in full swing at 7:30 a.m., have had to ask others to feed to my children. Eating lunch away from home? That's standard. We all do that. But what kind of mother can't feed her child breakfast? A mother like me, the kind who feels inordinately guilty about it, who thinks that every short stack her kids are deprived of will someday equal an hour on the therapist's couch.
I assuaged my guilt during my extra-large maternity leave after Little E was born. There was fruit and pancakes and whole-wheat waffles shaped like Mickey Mouse --and that was just on the weekdays. When I returned to work I tried to keep this up, to an extent, with homemade muffins that the girls could eat at daycare, but I quickly found that the strife caused by trying to whip up breakfast pastries from scratch acted in opposition to the calm. happy home these muffins were supposed to represent.
I fell to Pillsbury's lure and began buying a box of pumpkin muffin mix and a bag of Hershey's mini-morsels every week to satisfy Big E's love of pumpkin and chocolate. But a few weeks ago, there was a pre-Halloween run on pumpkin muffin mix and it occurred to me that now that I'm working part-time I could get back in the breakfast game --at least part way.
I found this pumpkin muffin recipe from the November 2006 issue of Gourmet Magazine on a blog named, appropriately enough, Muffin Top and followed it with the addition of the beloved mini-morsels.
INGREDIENTS:
1 1/2 cups all-purpose flour
1 tsp baking powder
1 cup canned solid-pack pumpkin
1/3 cup vegetable oil
2 large eggs
1 tsp pumpkin-pie spice (a combo of cinnamon, nutmeg, cloves, ginger, and allspice)
1 1/4 cups plus 1 Tbsp sugar
1/2 tsp baking soda
1/2 tsp salt
1 tsp cinnamon
6 ounces of mini chocolate chips (my addition)
Equipment: 12 foil or paper muffin liners; a muffin pan with 12 (1/2-cup) muffin cups
DIRECTIONS:
Put oven rack in middle position and preheat oven to 350F. Put liners in muffin cups.
Whisk together flour and baking powder in a small bowl.
Whisk together pumpkin, oil, eggs, pumpkin-pie spice, 1 1/4 cups sugar, baking soda, and salt in a large bowl until smooth, then whisk in flour mixture until just combined.
Gently stir in chocolate chips.
Stir together cinnamon and remaining 1 tablespoon sugar in another bowl.
Divide batter among muffin cups (each should be about 3/4 full), then spinkle tops with cinnamon-sugar mixture. Bake until puffed and golden brown and a wooden pick or skewer inserted into center of a muffin comes out clean, 25 to 30 minutes.
Cool in pan on a rack 5 minutes, then transfer muffins from pan to rack and cool to warm or room temperature.
Not only were these almost as easy to make as the mix muffins, they had a delicious cinnamony-sweet topping. The only problem: My grocery store considers canned pumpkin a seasonal item, but the reduction in breakfast-related guilt makes it worth stocking up.
Thursday, October 28, 2010
Eat: $25,000 Roast Chicken?
When I opted to reduce my work schedule to part-time this year, much of the appeal lay in the domestic bliss I imagined I'd be able to achieve with my extra hours. The house would be not only clean, but organized and surely I'd have time for those decorating projects I'd been putting off. I would whip up delicious, from-scratch baked goods and tasty nutritious dinners. All of this, I reasoned, would make part-time worth it.
My homemaking skills haven't quite earned back the missing 40 percent of my salary. I may throw in an extra load of laundry here and there, but our playroom is still swathed in blue painter's tape and we've been eating a lot of sandwiches. This chicken was my attempt to earn my keep, a taste of that elusive domestic bliss...but one that would, hopefully allow me time to help Big E with her homework, keep Little E from liberating every toy in the as yet unpainted playroom, and maybe make a little progress on the scarily thick folder of grading in my bag.
I used the Best Roast Chicken with Garlic-Herb Butter recipe from Stonewall Kitchen Favorites, and found that it was pretty simple and didn't require a huge amount of active prep time.
for the garlic butter:
5 garlic cloves, whole
1 tablespoon olive oil
3 tablespoons unsalted butter, at room temperature
1 tablespoon chopped fresh sage, or 1/4 teaspoon dried
1 tablespoon chopped fresh rosemary, or 1/4 teaspoon dried, crumbled
1 tablespoon chopped fresh time, or 1/4 teaspoon dried, crumbled
Salt and freshly ground pepper
for the chicken and vegetables
One 3- to 4-pound chicken
4 medium onions quartered (I only had one, but didn't feel that the finished product lacked for onions.)
11/2 pounds fingerling or new potatoes
Salt and freshly ground pepper
2 tablespoons olive oil
1 1/2 cups dry red or white wine
First, make the garlic butter by preheating the oven to 350 and putting the garlic in a small ovenproof pan and covering it with the olive oil. An 8-inch cake pan worked for me. Roast it for about 15 minutes; it will get tender and sweet. Remove them from the oven, let them cool for a few minutes.
In a small bowl mash together the butter and herbs, then season with salt and pepper. Chop or mash up the garlic and add it and any oil from the garlic roasting pan to the butter and mix well.
At this point you should move a rack to the lower third of the oven and preheat to 450. Then, prepare the chicken by removing the bag of giblets and rinsing the bird inside and out with cold water. I let it stand in a strainer in the sink for about 10 minutes to allow it to dry. At this point you can put the vegetables in a bowl and toss them with the olive oil.
Now the fun part: cut off any excess fat near the flaps of the cavity. Then wiggle your fingers beneath the skin to create a pocket between the breast meat and the skin; fill the pocket with half of the butter mixture and massage it into the breast meat. I am no fan of raw chicken flesh and was moderately horrified about doing this, but I assure that it is ultimately worth those few minutes of horror (and several additional minutes of aggressive handwashing).
Rub the remaining butter over the skin of the rest of the chicken, then put the chicken into a roasting pan. Surround it with the vegetables; if you have any leftover butter, melt it a little and drizzle it over them as I did. Full disclosure: At this point I feel compelled to admit that I have some form of poultry dyslexia and, as I often do when cooking a bird, I put the chicken in upside down. This wasn't actually a huge deal but did deprive us of tasty roasted breast skin, so beware.
Roast the chicken for 25 minutes, then pour half of the wine over the chicken and toss the vegetables so they'll brown easily. Turn the oven down to 375 and roast the chicken for another 20 minutes; pour the rest of the wine over it and toss the vegetables again. Roast for another 20 to 25 minutes or until the juices run clear.
Transfer the vegetables to a serving bowl and allow the chicken to rest for about 10 minutes. After carving the chicken and putting it on a serving platter, do not forget to spoon the pan juices over the sliced meat.
So, was it $25,000 worth of domestic bliss? Maybe more like $25, but it was tasty. My family appreciated it, and I got to get in touch with my inner-June Cleaver, serving Sunday Dinner on a weeknight.
Most importantly, it gave me hope: only $24, 975 worth of bliss to go.
My homemaking skills haven't quite earned back the missing 40 percent of my salary. I may throw in an extra load of laundry here and there, but our playroom is still swathed in blue painter's tape and we've been eating a lot of sandwiches. This chicken was my attempt to earn my keep, a taste of that elusive domestic bliss...but one that would, hopefully allow me time to help Big E with her homework, keep Little E from liberating every toy in the as yet unpainted playroom, and maybe make a little progress on the scarily thick folder of grading in my bag.
I used the Best Roast Chicken with Garlic-Herb Butter recipe from Stonewall Kitchen Favorites, and found that it was pretty simple and didn't require a huge amount of active prep time.
for the garlic butter:
5 garlic cloves, whole
1 tablespoon olive oil
3 tablespoons unsalted butter, at room temperature
1 tablespoon chopped fresh sage, or 1/4 teaspoon dried
1 tablespoon chopped fresh rosemary, or 1/4 teaspoon dried, crumbled
1 tablespoon chopped fresh time, or 1/4 teaspoon dried, crumbled
Salt and freshly ground pepper
for the chicken and vegetables
One 3- to 4-pound chicken
4 medium onions quartered (I only had one, but didn't feel that the finished product lacked for onions.)
11/2 pounds fingerling or new potatoes
Salt and freshly ground pepper
2 tablespoons olive oil
1 1/2 cups dry red or white wine
First, make the garlic butter by preheating the oven to 350 and putting the garlic in a small ovenproof pan and covering it with the olive oil. An 8-inch cake pan worked for me. Roast it for about 15 minutes; it will get tender and sweet. Remove them from the oven, let them cool for a few minutes.
In a small bowl mash together the butter and herbs, then season with salt and pepper. Chop or mash up the garlic and add it and any oil from the garlic roasting pan to the butter and mix well.
At this point you should move a rack to the lower third of the oven and preheat to 450. Then, prepare the chicken by removing the bag of giblets and rinsing the bird inside and out with cold water. I let it stand in a strainer in the sink for about 10 minutes to allow it to dry. At this point you can put the vegetables in a bowl and toss them with the olive oil.
Now the fun part: cut off any excess fat near the flaps of the cavity. Then wiggle your fingers beneath the skin to create a pocket between the breast meat and the skin; fill the pocket with half of the butter mixture and massage it into the breast meat. I am no fan of raw chicken flesh and was moderately horrified about doing this, but I assure that it is ultimately worth those few minutes of horror (and several additional minutes of aggressive handwashing).
Rub the remaining butter over the skin of the rest of the chicken, then put the chicken into a roasting pan. Surround it with the vegetables; if you have any leftover butter, melt it a little and drizzle it over them as I did. Full disclosure: At this point I feel compelled to admit that I have some form of poultry dyslexia and, as I often do when cooking a bird, I put the chicken in upside down. This wasn't actually a huge deal but did deprive us of tasty roasted breast skin, so beware.
Roast the chicken for 25 minutes, then pour half of the wine over the chicken and toss the vegetables so they'll brown easily. Turn the oven down to 375 and roast the chicken for another 20 minutes; pour the rest of the wine over it and toss the vegetables again. Roast for another 20 to 25 minutes or until the juices run clear.
Transfer the vegetables to a serving bowl and allow the chicken to rest for about 10 minutes. After carving the chicken and putting it on a serving platter, do not forget to spoon the pan juices over the sliced meat.
So, was it $25,000 worth of domestic bliss? Maybe more like $25, but it was tasty. My family appreciated it, and I got to get in touch with my inner-June Cleaver, serving Sunday Dinner on a weeknight.
Most importantly, it gave me hope: only $24, 975 worth of bliss to go.
Labels:
domestic bliss,
Eat,
part-time work,
roast chicken,
Sunday Dinner
Subscribe to:
Posts (Atom)